 listicle
7 Ways to Improve Home Audio Sound Quality
Table of Contents
- 1. Best Room Acoustics Treatment for Home Hifi
- 2. Speaker Placement Guide for Stereo Imaging
- 3. Optimising Turntable Setup for Better Sound
- 4. Vibration Isolation and Speaker Stands
- 5. Software-Based Room Correction (DSP)
- 6. Streaming Quality Settings and DAC Upgrades
- 7. Cable Quality and Maintenance for Lasting Sound
- Conclusion: Your Next Step to Better Home Audio
- Frequently Asked Questions
Last Updated: September 19, 2026
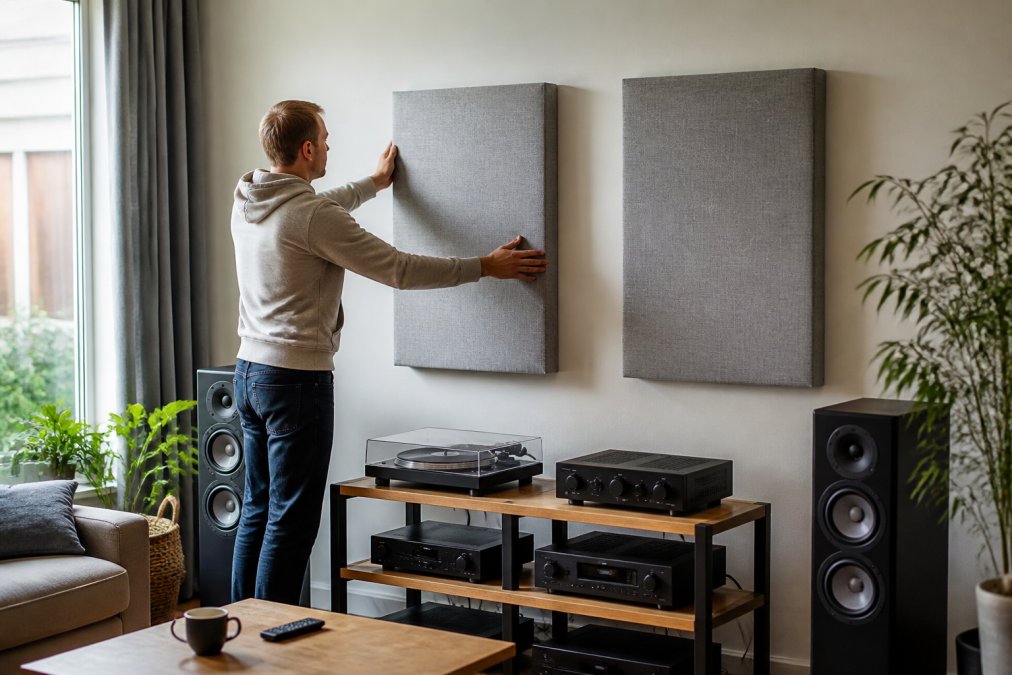
1. Best Room Acoustics Treatment for Home Hifi
Your room shapes your sound more than any single component you can buy. Before you spend another penny on gear, treat the space itself. Home audio is a chain, and the room is the first link.
- Bass traps in corners control low-frequency buildup
- Absorption panels at first reflection points tame harshness
- Diffusers on rear walls scatter sound for a more natural feel
DIY Acoustic Panels That Actually Work
2. Speaker Placement Guide for Stereo Imaging
Speaker placement is free, and it changes everything. Get it right and your system gains depth, focus, and a convincing soundstage without a single upgrade.
The 83% Rule and Toe-In Explained
The 83% rule is a starting point for room-friendly placement. It suggests positioning your speakers so they sit roughly 83% of the distance apart as they are from your ears, which reduces early reflections and smooths the frequency response. Many listeners find this creates a wider, more natural stereo image than an exact equilateral setup.
- Start with the 83% rule as your baseline
- Angle speakers inward until the centre image snaps into focus
- Keep both speakers symmetrical to your seat
3. Optimising Turntable Setup for Better Sound
A turntable rewards patience. Small setup errors cost you detail, tracking, and bass weight, so calibration matters as much as the cartridge you run. Work through the steps below in order, each one depends on the last being correct.
Step 1: Level the deck
Place a spirit level on the platter and adjust the feet until the bubble sits centred in both directions. An unlevel platter introduces uneven tracking force across the record and audible distortion on one channel. Check the shelf or wall bracket too: a floor that flexes underfoot will undo a perfectly level deck.
Step 2: Set vertical tracking force (VTF)
Set the tracking force to the cartridge maker's recommended figure, usually quoted as a range with a midpoint. Use a dedicated stylus force gauge rather than the counterweight scale, the scale is a starting point, not a measurement. If the maker quotes 1.8-2.2g, start at 2.0g and fine-tune by ear from there.
Step 3: Match anti-skate to VTF
Anti-skate counteracts the inward pull the groove exerts on the stylus. Set it to roughly the same value as your tracking force, then confirm with a blank or unmodulated record side: the arm should drift slowly inward or stay put, not skate across. Too little anti-skate wears the inner groove wall; too much wears the outer.
Step 4: Align the cartridge
Use a protractor to set overhang and offset angle so the stylus sits correctly in the groove at both the outer and inner null points. Misalignment is the most common cause of sibilance and inner-groove distortion on records that otherwise sound fine. Take your time here, a millimetre matters.
Step 5: Set azimuth and VTA
Azimuth is the stylus's vertical alignment in the groove; viewed from the front, the cantilever should sit perpendicular to the record. Vertical tracking angle (VTA) is the arm's height at the pivot, which sets the stylus rake angle. Adjust VTA by raising or lowering the arm base in small increments until vocals lock into focus and the top end opens up.
Step 6: Check speed and clean the stylus
If you're new to vinyl, a plug-and-play deck removes most of the guesswork. The Rega Planar 1 arrives with a pre-fitted Carbon cartridge and a low-vibration 24V motor, so you're spinning records in minutes rather than fiddling with alignment for hours. Just remember that even a plug-and-play deck benefits from a level check and a fresh stylus brush.
4. Vibration Isolation and Speaker Stands
Vibration is the enemy of clarity. Every cabinet, shelf, and floorboard your gear sits on feeds resonance back into the signal, blurring detail and softening the soundstage.
- Use rigid stands filled with dry sand or steel shot for extra mass
- Add isolation feet under turntables and amplifiers
- Keep speakers off shared surfaces with other gear
5. Software-Based Room Correction (DSP)
Digital signal processing is the angle most guides skip, and it's often the cheapest big win. Room correction software measures how your room colours the sound, then applies precise EQ to flatten the response.
6. Streaming Quality Settings and DAC Upgrades
Your streaming settings quietly cap your sound quality. Many services default to compressed streams, so check your app and switch to the highest quality tier available, ideally lossless audio.
- Set your streaming app to its highest quality tier
- Enable lossless or high-resolution audio where offered
- Add an external DAC for cleaner, more detailed playback
7. Cable Quality and Maintenance for Lasting Sound
Cables won't transform a bad system, but poor ones can hold a good one back. Standard bell wire adds resistance and rolls off high frequencies. Decent cable maintains signal purity. The bigger, cheaper win most guides skip is maintenance: dust, oxidation and loose connections degrade signal clarity over time, and fixing them costs nothing.
Choosing speaker cable
For runs under about five metres, 2.5mm² oxygen-free copper is a sensible baseline; go thicker for longer runs or low-impedance speakers. Look for consistent strand construction and a jacket that won't stiffen with age. The QED XT40i uses oxygen-free copper and X-Tube technology to keep high-frequency performance consistent across the audible band. Terminate with banana plugs or spade connectors rather than bare wire, a clean, tight termination beats a frayed one every time.
Interconnects and digital cables
Keep analogue interconnects short and screened, and route them away from mains cables. For network streamers, the AudioQuest Pearl Ethernet Cable minimises jitter and packet loss. The gains are real but subtle, so treat cables as the final polish, not the headline upgrade. Spend the money on room treatment and speaker placement first.
The maintenance routine that actually matters
- Clean connectors every few months. Pull each plug, wipe the contact surfaces with isopropyl alcohol on a lint-free cloth, and let them dry fully before reseating. Oxidation builds a resistive layer that dulls transients.
- Reseat firmly. A plug that's been nudged loose adds intermittent resistance. Push each connector home and check speaker terminals are tight.
- Inspect for corrosion. Green or black discolouration on copper is a sign of moisture ingress. Cut back and re-terminate rather than trying to clean it.
- Keep cable runs tidy and separated. Signal cables should cross mains cables at right angles where they must meet, never run parallel alongside them.
- Dust the gear. Vents, heatsinks and the tops of amplifiers collect dust that traps heat and shortens component life. A soft brush and a can of air do the job.
| Problem | Fix | Impact |
|---|---|---|
| Boomy, muddy bass | Bass traps and DSP | Tighter low end |
| Vague stereo image | Speaker placement and toe-in | Sharper soundstage |
| Harsh reflections | Absorption panels | Smoother treble |
| Digital glare | External DAC | Cleaner detail |
| Worn stylus | Replace and realign | Restored tracking |
| Dull, veiled treble | Clean and reseat connectors | Restored clarity |
Conclusion: Your Next Step to Better Home Audio
Getting great sound isn't about spending the most, it's about getting the basics right in the right order. Treat the room, place your speakers properly, isolate vibration, and only then chase upgrades.
Frequently Asked Questions
What is the 83% rule for speaker placement?
The 83% rule suggests that the distance between your two speakers should be about 83% of the distance from each speaker to your listening position. For example, if you sit 3 metres from each speaker, they should be roughly 2.5 metres apart. This ratio helps create a balanced soundstage with accurate stereo imaging. Experiment with small adjustments, as every room interacts differently with your speakers.
How can I effectively fix poor room acoustics at home?
Start by identifying problem areas: clap your hands and listen for echoes, or use a room correction app. Add thick rugs, curtains, and soft furnishings to absorb high frequencies. For bass issues, place bass traps in corners. DIY acoustic panels made from mineral wool and fabric are a budget-friendly option. Also, try moving your listening position to about 38% of the room's length from the front wall to reduce standing waves.
Does speaker cable quality actually affect sound performance?
Yes, but the difference is often subtle compared to room acoustics or speaker placement. Standard bell wire can degrade signal, especially over long runs. Upgrading to oxygen-free copper cables with good insulation, such as QED XT40i, can improve detail and bass control. Ensure cables are securely terminated with banana plugs. For most systems, a modest investment in decent cable is worthwhile, but diminishing returns apply.
How do I optimise my turntable setup for better sound?
Ensure your turntable sits on a stable, level surface. Use a spirit level to check. Adjust the tracking force and anti-skate to the cartridge manufacturer's specifications. Keep the stylus clean with a brush and use a record cleaning service for vinyl. If your turntable has a removable headshell, verify alignment with a protractor. Even small tweaks like these can reduce distortion and improve tracking.
What is the 38% rule for listening position in room acoustics?
The 38% rule recommends placing your listening chair about 38% of the room's length from the front wall (where your speakers are). This position minimises the effect of standing waves and room modes, which can cause uneven bass. For a 5-metre-long room, that's roughly 1.9 metres from the front wall. Combine this with speaker placement adjustments for the best results.